Weston Middle School
Technology/Engineering Course Materials
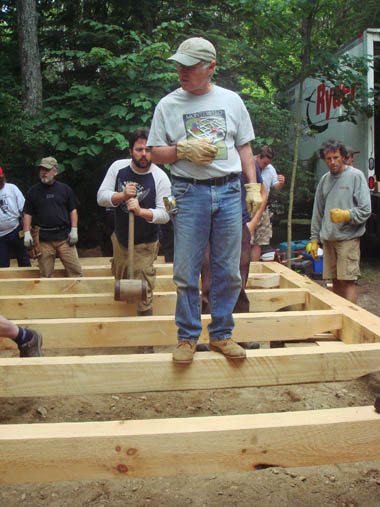
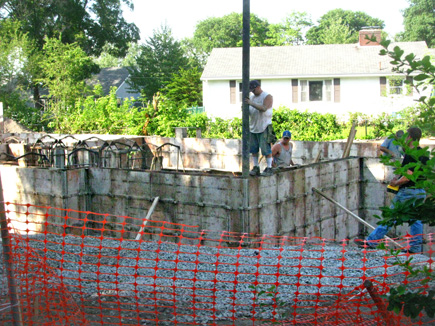
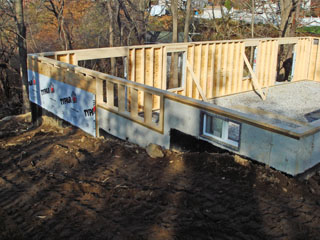
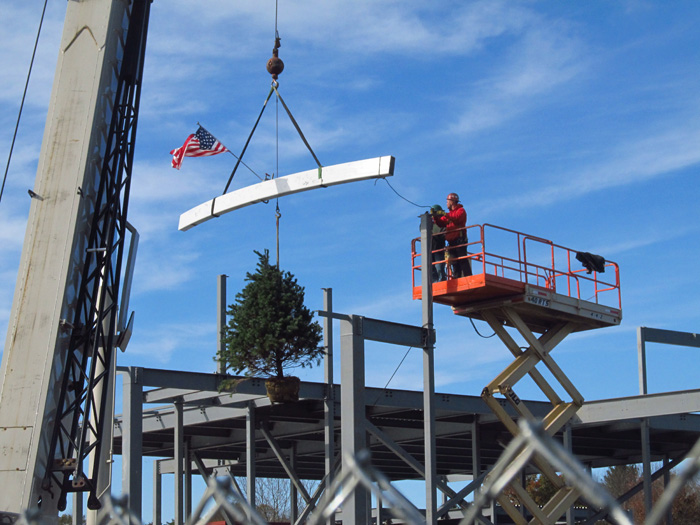
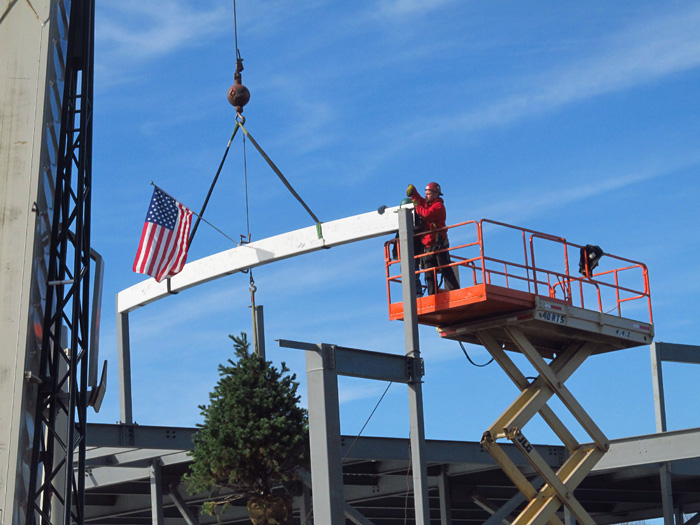
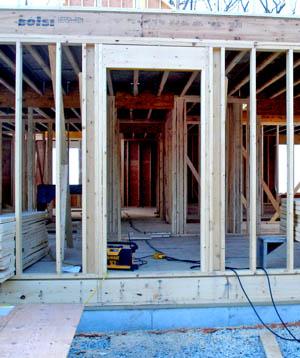
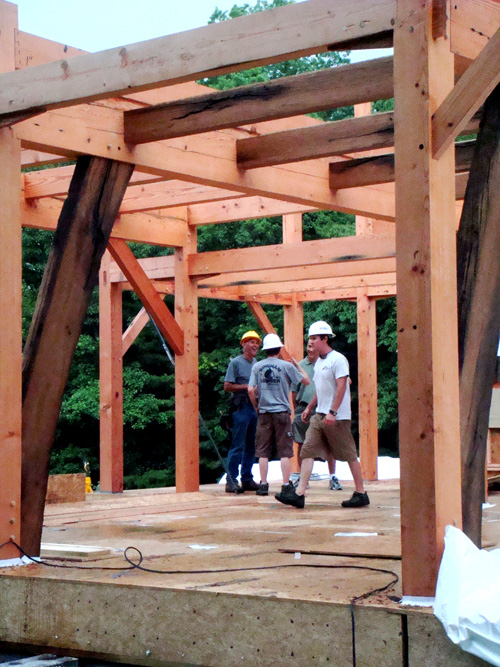
- Set out construction photos, display, Timberframing books
- Set up video ( This Old House- Weston)
- Set up cardboard/handyboard, laminated plans
- Introduce Timberframing Unit
- Will teach house construction and tool use
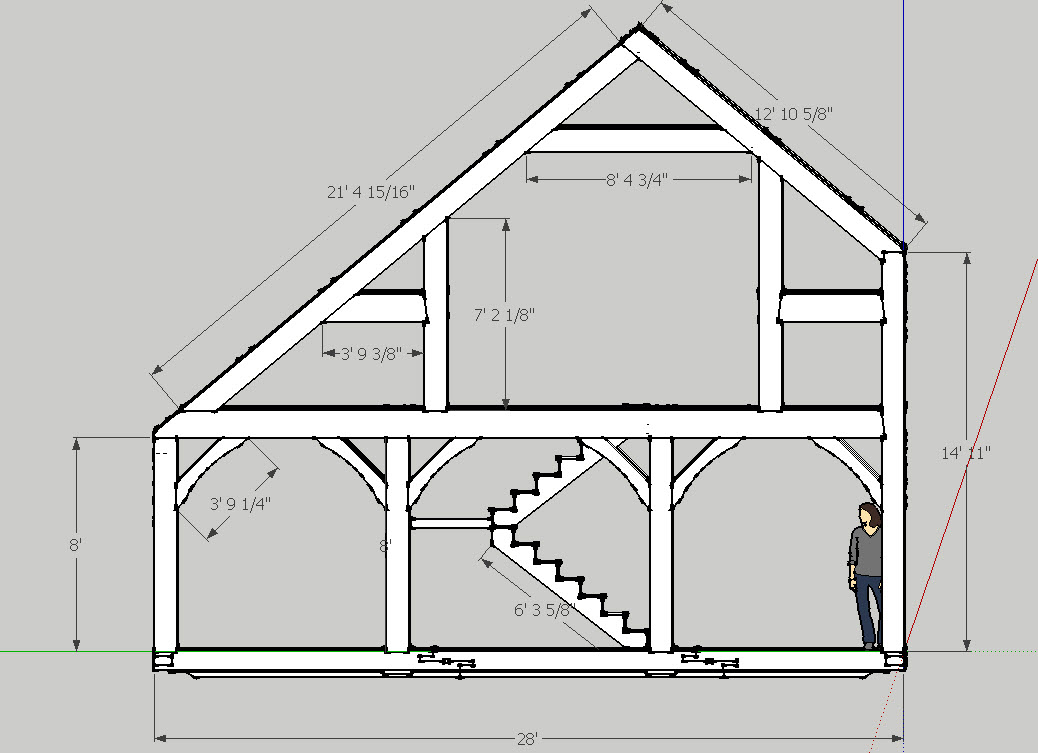
- On board: Parts of a house:
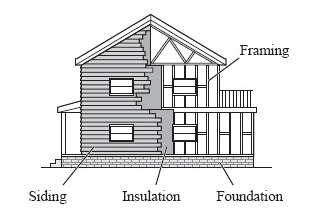
- Footing- spreads out Dead Load- footing area depends upon soil compressive strength- demonstrate with brick on sponge rubber
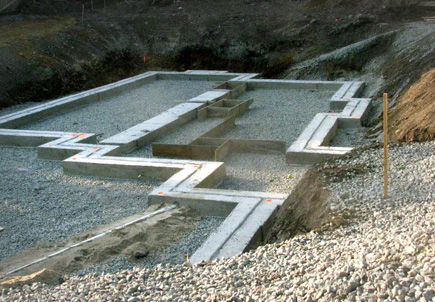
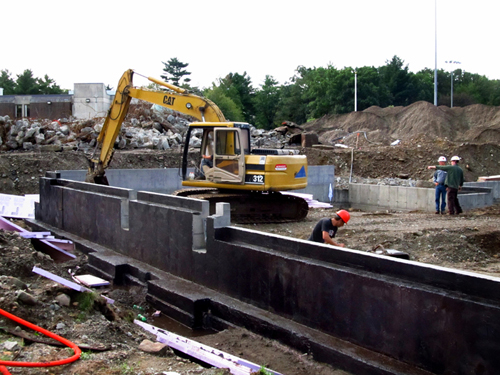
- Foundation- keeps wood away from soil, and supports structure- show photos
- Optional: Demo with Wonderboard
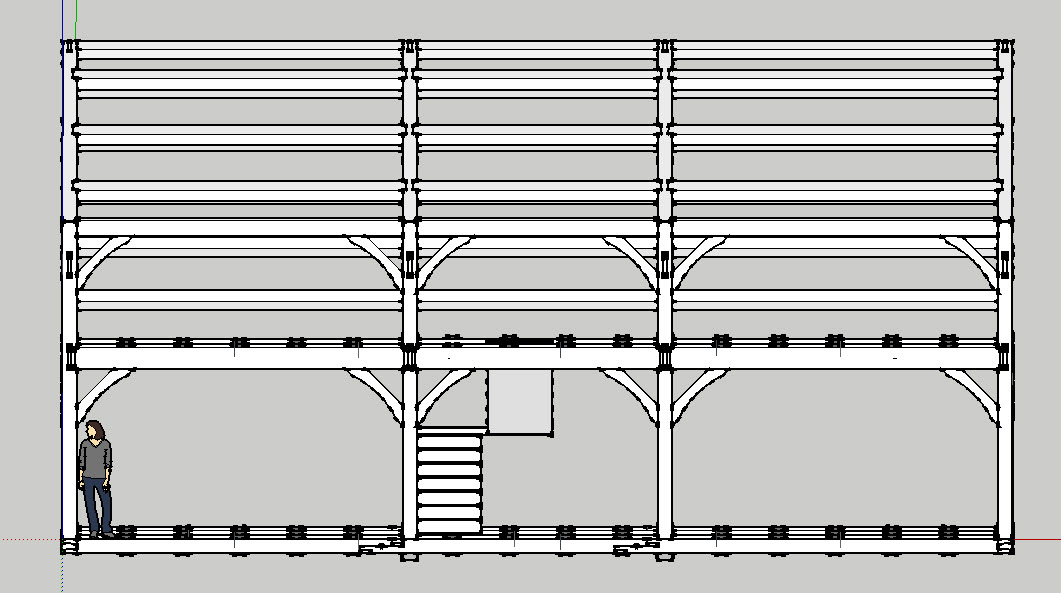
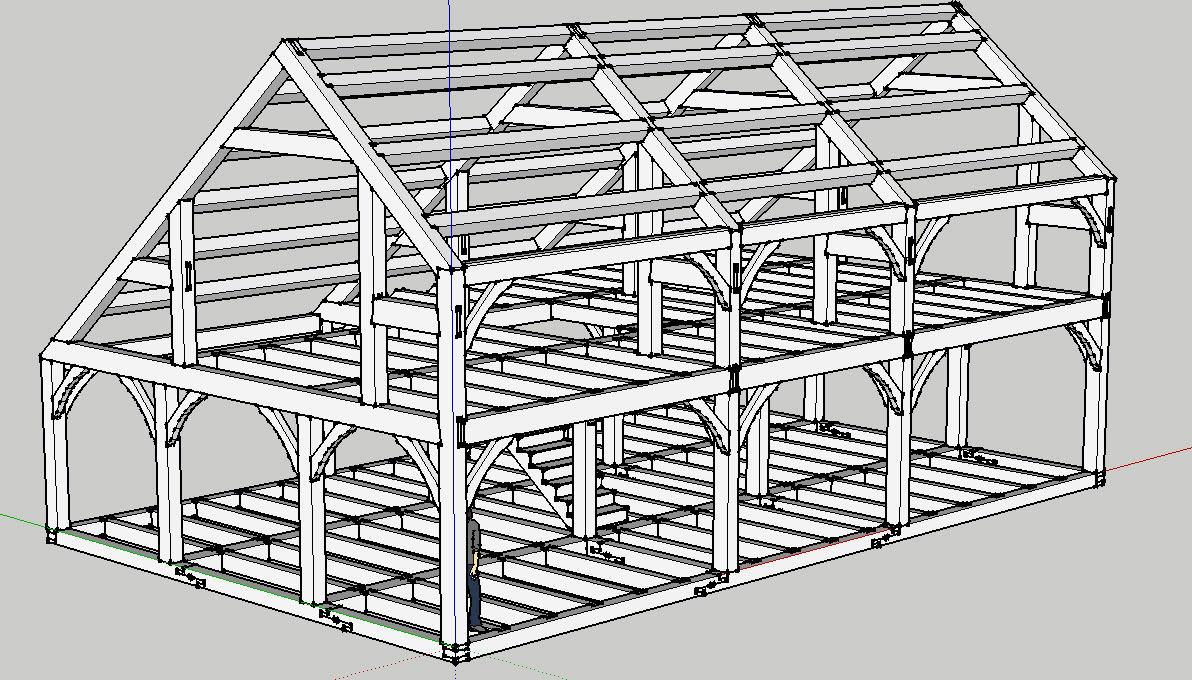
- Framing-structure of building- beams and posts
- Insulation and Sheathing
- Utilities, Interior finishing
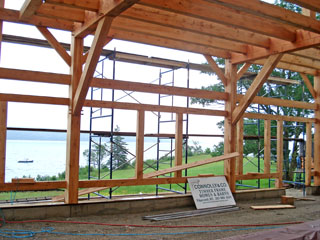
- We will use a type of framing called post-and-beam or timberframing
- Timberframing video(segment) from This Old House- using prefab insulated foundation slabs
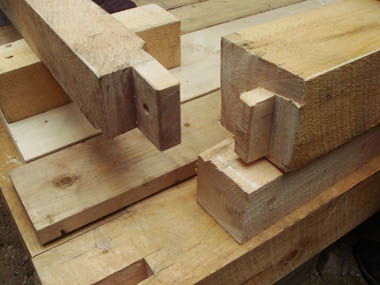 tenons
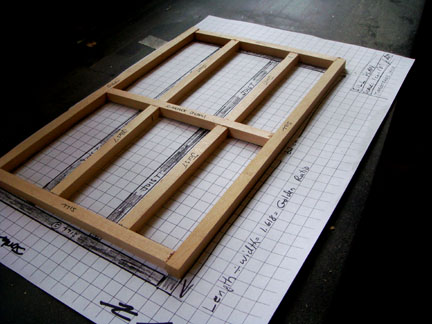
- We will build houses in partners, on a scale of about 1:16
- Attach standard sill plan(handout) to cardboard
- Other plans are possible. However, you may not begin building until you have drawn plans to scale of the sill frame and the bents, and they have been approved. A better option is to build the 'starter' home, then add chimneys, additions, porches, decks,etc.
- Write Titleblock in corner with Sharpie- Names,Date, Scale
- Write directions- NSWE
from Building the Timberframe House by Tedd Benson and James Gruber
- Demo: Marking and Cutting wood with miter saw
- Cut wood for sills to plan
-
Lesson 2: - Set
out construction photos, display, Timberframing books
Set up glue guns - On
Board: Sill Plan with terminology-
summer beam, joists, sill
Max unsupported span of wood beams- 20’
Mark and cut- use try-square; cut with miter saws or mini or large dovetail saws
- Handout: Timberframe Terminology
- Glue gun technique and safety
- Timberframing requires accurate measurement- 3 cross pieces should be sanded to be same lengths
- Cut wood for sills to plan
- Gluing order: Glue joists to summer beam; glue on end sills, then long sills
-
Hot-Glue down Sills, joists
Optional Demo:
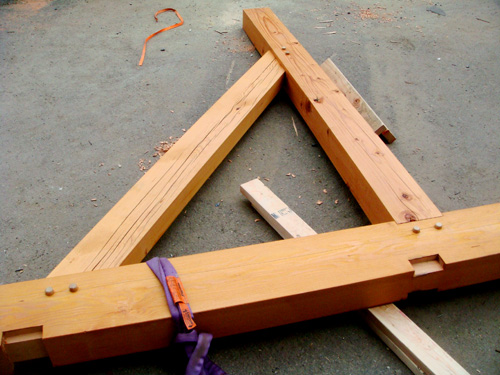
- Timberframe joinery
- Joinery
Details from Benson and Gruber (pdf)

Lesson 3:
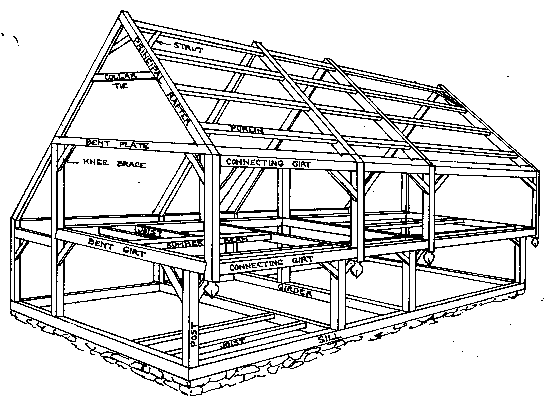
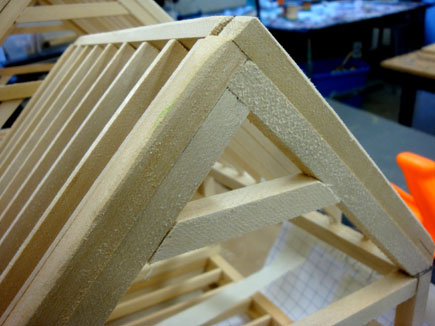
- Prep: Draw Bent on Board- posts, girts, knee braces (rafters)
- Draw Miter Saw on Board- stop block
- Set Up Miter Saw
- Get Glue guns set up

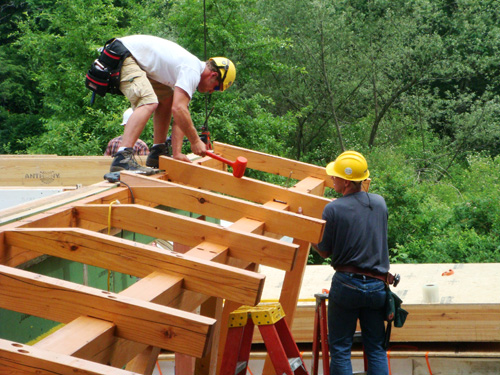
In timberframe construction, once the sills are finished, the bents are constructed and raised as a unit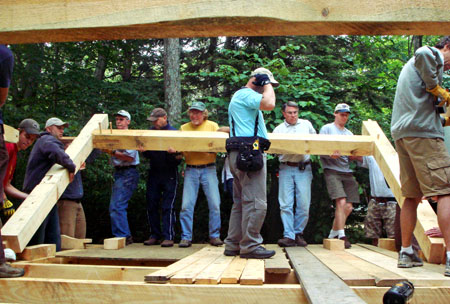
Parts:Posts, Girts(horizontal beams), braces, rafters
Building Efficiently: Cut all identical pieces at the same time, using stop blocks- 4-6 posts, 6-9 girts, braces
Fastening Miter saw to bench
Demonstrate how to use stop blocks for repetitive cutting
Braces:
Make one 45 degree piece, then use it as a stop block
In mass production, each station makes a certain piece—more efficient,
but less interesting
Lesson 4:
- How do you do repetitive cutting( ask)?
- Finish bents- cut similar pieces one after the other
- Add Girts
Options for Roof Truss Framing
Saltbox, cantilevers,etc.
- Attach end trusses,(temp) purlins
- Measure and cut rafters; join with 1/8"pegs
- Finish bents
- Cut connecting girts( cut at least 10)-
- Demo: Cutting multiple pieces- line up ends, tape
- If not quite right length, sand/use ‘cheater’ blocks( glue on first)- girts rest on them
- Top-most girt is called ridge-pole
- Lower ones in roof- purlins
- Second floor has summer-beams, joists
-
Try using natural sticks for knee-braces
• Topping- out ceremony with pine-bough-tradition
• Once purlins in place- use thinner beams as rafters- demonstrate
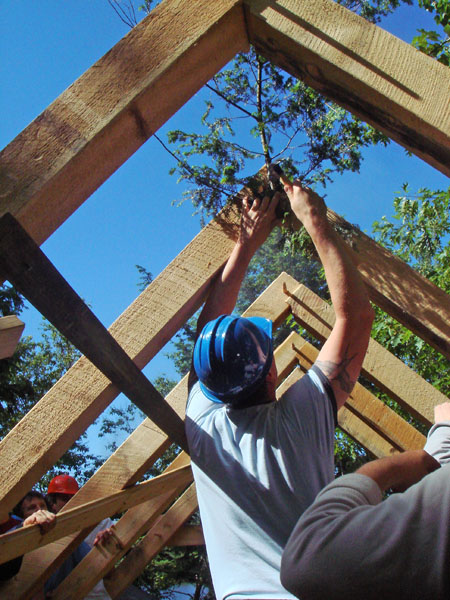
Topping-out ceremony- an ancient custom
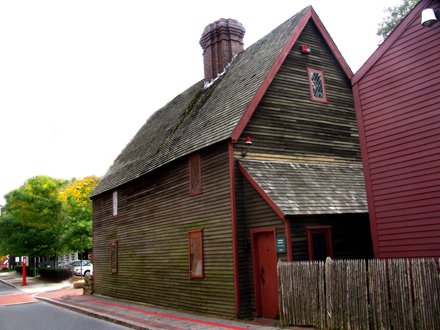
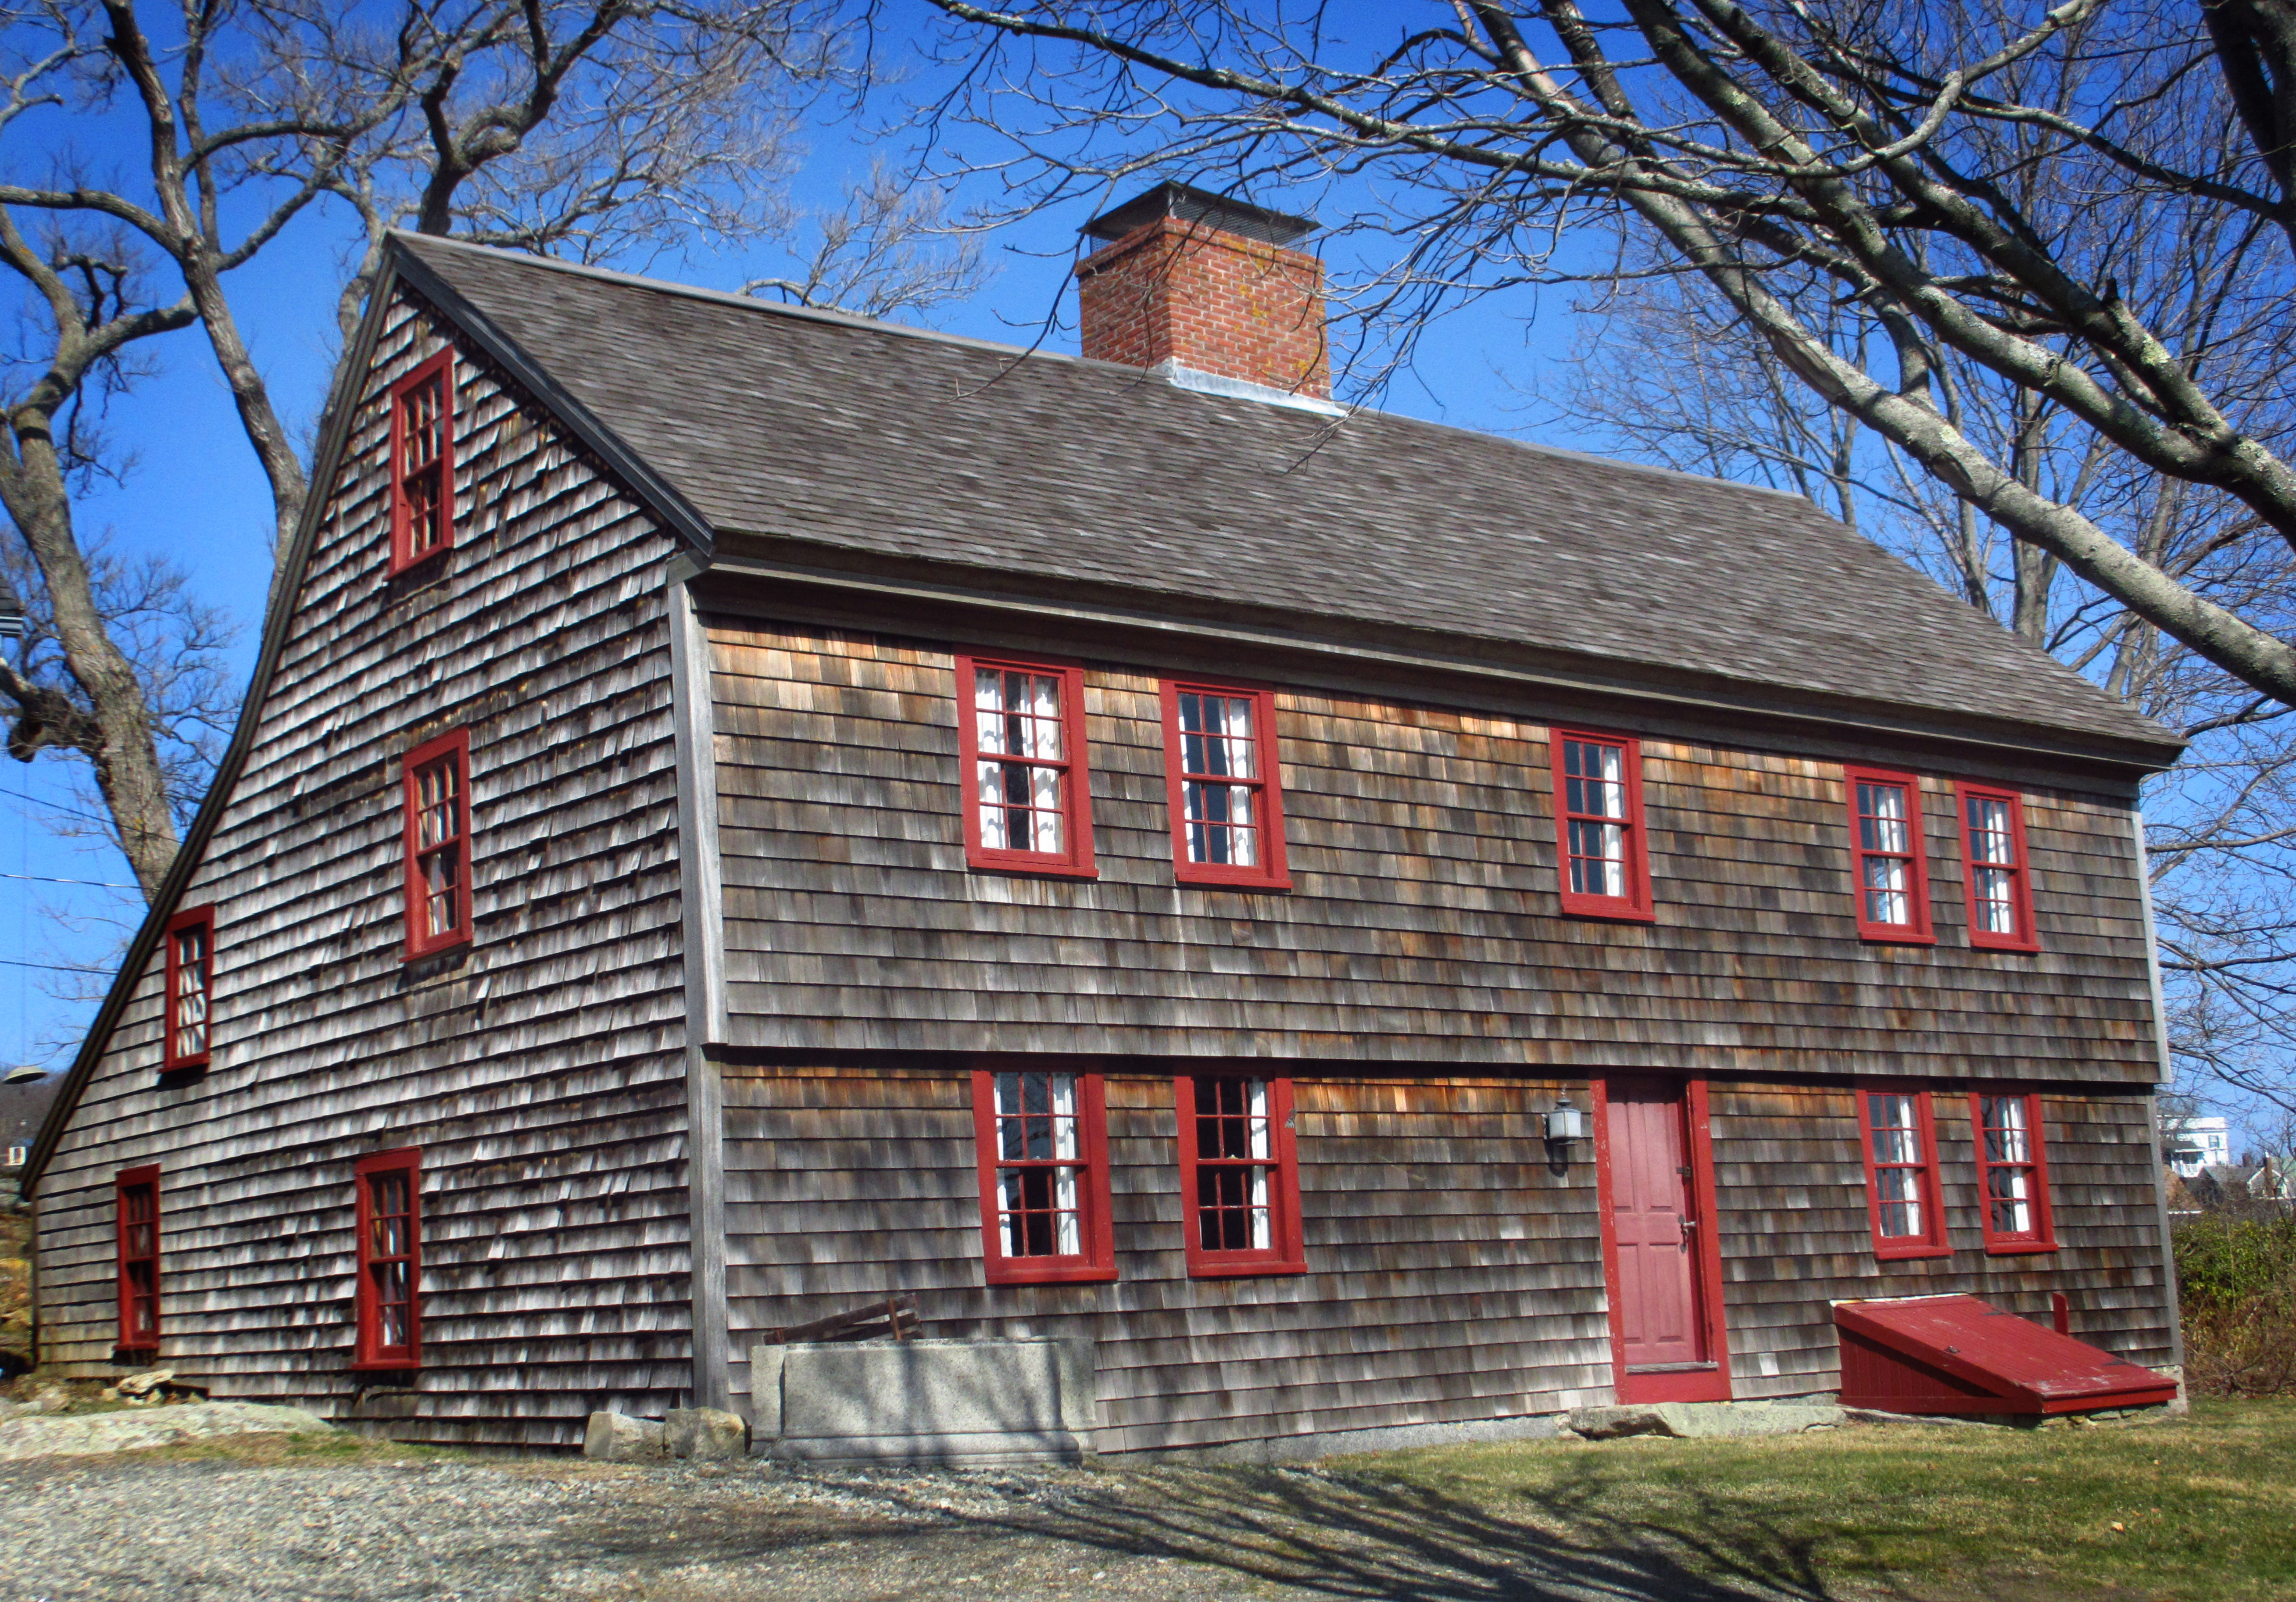
House in Salem, MA- Similar to Frame House
- Add Summer beam
- Add Joists
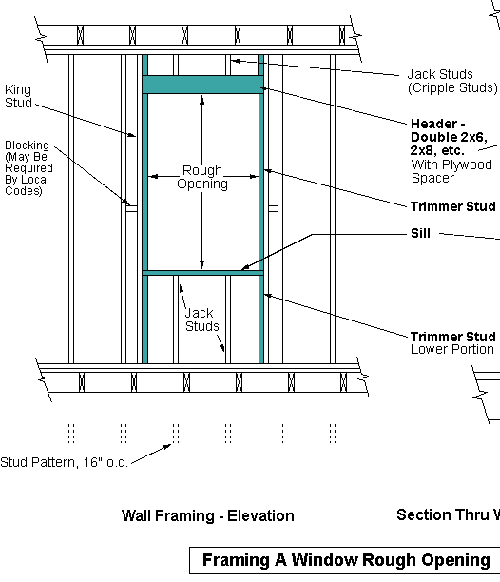
- Door Rough-In Framing- demonstrate
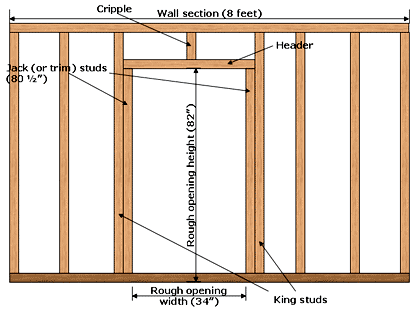
- Window Rough-in Framing
- Optional:
Add Porch
Lesson 5:
- Prep: Cardboard squares 4x8 cm; cut stringers; cut treads
- On
board:
- Rough-in Framing for Doors- headers, cripple studs
- Do partial flooring; floor joist on 2nd or 3rd floor; vinyl flooring
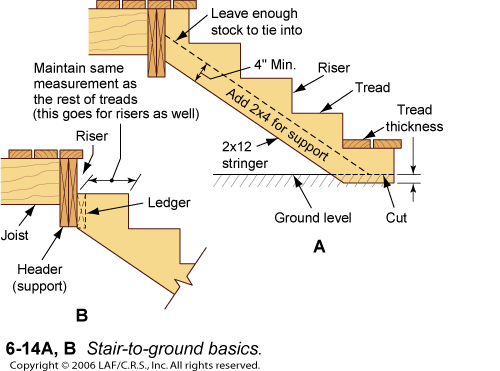
- Stairs: Using Stringers- tread/riser; rise+run= 17”; cutting top and bottom of stringer
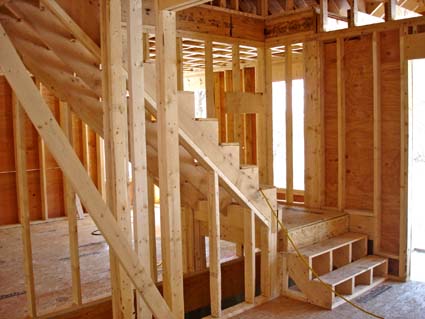
- Bottom sits on floor, top goes against joist
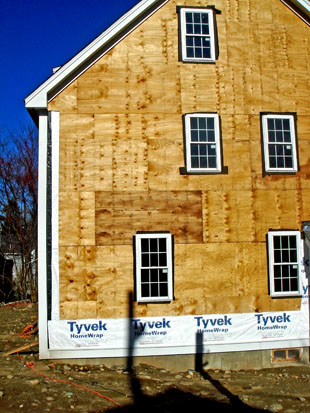
- Insulation/ prefab wall paneling
- Sheathing
- Add
Model Solar Panels:
- Passive Solar- Uses windows, orientation of house to collect heat- like a car on a sunny winter day; stores heat in thermal mass
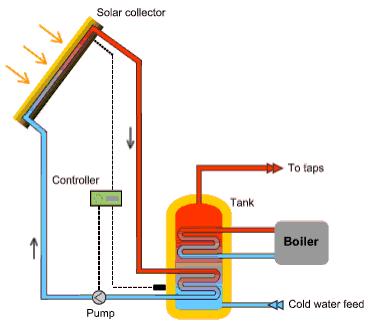
- Active Solar Heating- uses fluid pumped through reflectors or black panels to collect heat
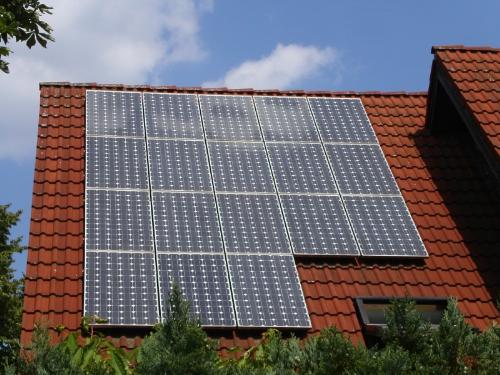
- Photovoltaics- convert sunlight directly into electricity
- Super Insulation
- Optional
Add-ons:
• Chimney
• Porches
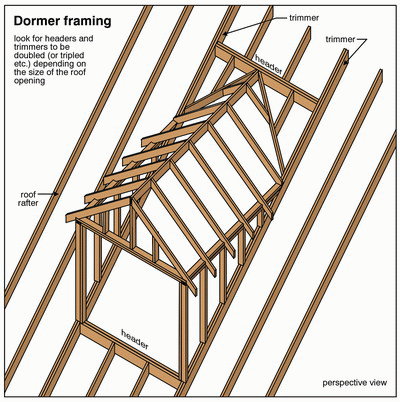
• Dormers
• Cantilevered Porch
Slideshow: Salisbury Island Timberframing
Videos: