Day |
Class
Notes |
Activities |
Materials |
1 |
Discuss
options with cover; edge treatments, dividers
Demonstrate
use of miter saw on small wood |
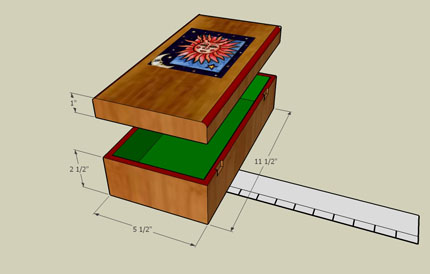
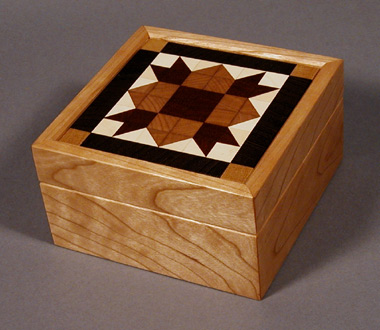
MITERED
BOX
Requirements:
- Box
- Fine
Finish
- Decorative
element
- Mortised
hinges
- Pull
or knob
Show
Sample Boxes
Gallery
of Artist Boxes
Box
Profiles
Cover
Types:
- Flush
cover
- Recessed
cover in dado-with picture
- Recessed
cover in Dado+ layers
- Drop-In
Cover+ Handle
Techniques:
Using a miter saw; cutting a rabbett |
- 4"x
4' x 1/2" Aspen or poplar
- 1/4"
plywood or strapping, glued up
- Glue
- Stains
- Milk Paint
- Polyurethane
- Brushes
- Hinges
- Latches
- 3/8"
feet
|
|
|
Stains-
Introduce stain application
Stain wood |
|
|
|
Demonstrate
mark-up and cutting of sides- mark length, sktch in angles
Review
use of miter saw.
Demonstrate
use of router to make rabbetts. |
- Rip
wood to width- 2", 3", 3.5"
- Rout
rabbett for bottom cover, 1/4" groove for picture-frame top
cover
- Cut
sides to length using miter saw
- Optional:
Mark angles if multiple-sided
- Cut
sides with miter saw , matching opposite sides
- (Rabbet
top and bottom for covers)
Assign
cleanup jobs
|
Do
not cut short pieces, then miter- it is always easier
to cut a short piece off of a long piece
hat act on structures
Alternate
to mitered joints- pinned rabbeted joint (see Stowe
Article)
|
|
|
Demonstrate
glue-up of box using picture-frame clamp- size joints with diluted
glue, then use straight glue.
Demonstrate
use of bandsaw- mark line, cut relief cuts, work your way in
Explain
progression of grits
Demonstrate
gluing of covers |
- Clean
up joints
- Sand
sides
- Tape-up
sides
- Sand
and plane flat
- Mark
up cover stock to fit + extra
- Cut
cover stock with bandsaw
- Sand
with random orbit sander--80-150-220 grit
- Glue
on covers with bar clamps using woodglue- take care that clamps
put pressure over sides, not middle
|
Bandsaw
Safety Form
Option:
Glue up sides and covers in one operation- helps maintain flatness |
|
|
|
|
|
Demonstate
safe use of router
Demonstrate
use of plane.
Demonstrate
doweling technique.
Demonstrate
use of drill press. |
- Trim
most excess wood with bandsaw
- Trim
cover flush with sanding block or flush trim bit
-
demonstrate router safety
- Mark
location of cover cut
- Cut
box open on table saw( teacher)
Sand/Plane edges
- Add
pull or handle-dowel in place
|
Router
Safety Form |
|
|
|
|
|
Demonstrate
cutting a hinge mortise. |
- Final
sanding
- Mortise
hinges
|
Sanding
Tips by Norton Abrasives Company |
18-19 |
Videos:
Cutting a Hinge Mortise
|
|
20-23 |
|
- Mark
holes for feet
- Drill
holes for 3/8" feet with Forstner bit, glue in place
|
|
|
|
|
|
|
|
- Sand
- Glue
lining onto bottom
- Add
acrylic base colors
- Print
design
- Transfer
to box with carbon paper
- Etch
design into wood with woodburning tool
- Finish
with acrylics or dye-stains; gold leafing with size; add polyurethane
gloss(2-3 coats) using buffing pad between coats
- Optional:
1/8" pine lining
- Add
paper lining or acrylics or flocking to inside
- Install
hinges; adjust
- Add
latch or pin
|
|